Showing posts with label decor. Show all posts

Friday, 18 April 2014

how to decoupage a set of ikea drawers

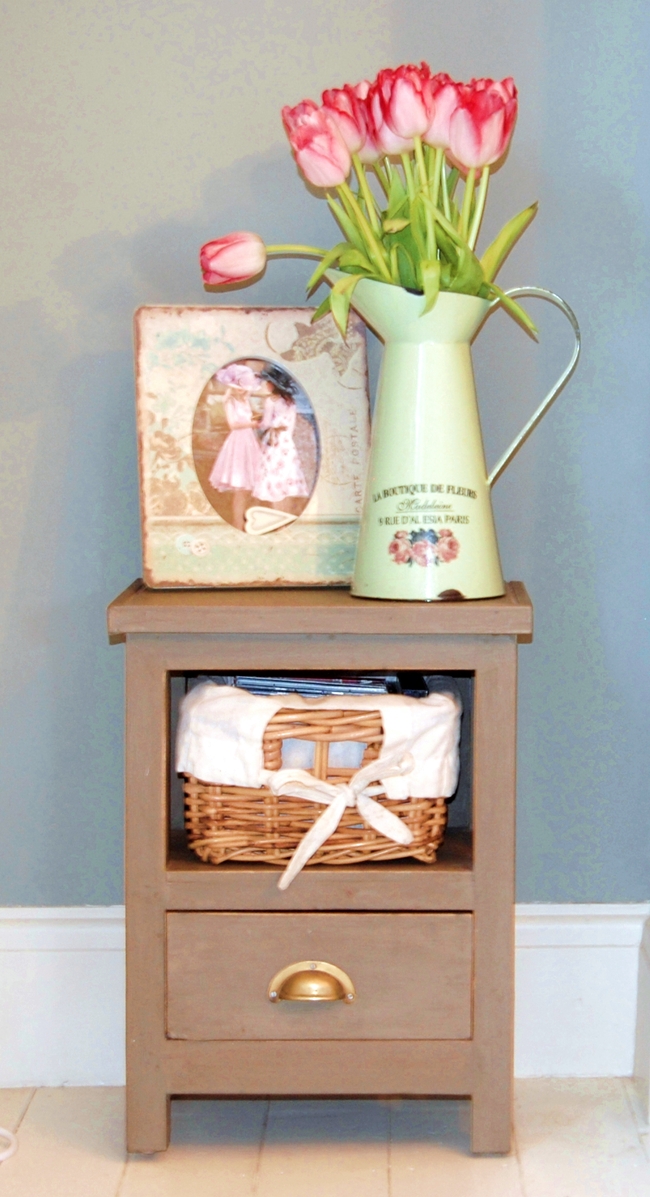
As it's the holidays, I have finally got around to finishing this little set of drawers that I bought from Ikea many years ago. They were looking tired and past their best, so I had to find a way to make them look good enough to stay in my bedroom. I decided to use pictures from old Gil Elvgren desk top calendars.

It is my third decoupage project on the blog as I have also decoupaged a serving tray and a jewellery box.

You will need:
  • wooden drawers, or any other piece you want to decorate
  • pictures on paper
  • water-based primer
  • water-based matte varnish
  • polyurethane varnish
  • PVA glue
  • wooden knobs with screws
  • satin finish paint (for the insides)
  • paper towel
  • fine sandpaper (wet and dry is best)
  • soft cloth
  • paint brush
  • glue brush

What you do:
  1. Wash off any grease from the drawers.
  2. Lightly sand down all surfaces.
  3. Apply two coats of primer, lightly sanding after each coat.
  4. Use the satin finish paint to coat any surfaces you are not decoupaging.
  5. Plan each face by laying out the pictures. Cut each one out and glue it onto the wood, taking care that there are no air bubbles by pressing lightly with a damp lint free cloth. The pictures can, and should overlap to some extent. Let it dry.
  6. Brush on at least four coats (I used six) of water-based matte varnish, sanding lightly after each to remove bumps.
  7. After wiping to remove dust, finish with two coats of polyurethane varnish for extra toughness.
  8. Finish by giving the knobs a coat of primer, a couple of coats of paint and a couple of coats of oil-based varnish. Screw them onto the drawers from the back.

Tip: Give each picture a few moments to stretch after you apply glue. Then, as long as you avoid air bubbles, they will dry flat. Don't be worried by bubbles that seem to keep lifting, as they will flatten when the paper dries.


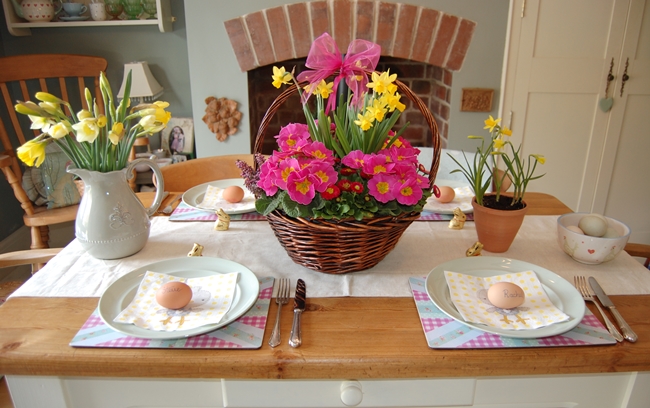
Have a great Easter weekend. I hope the Easter Bunny brings you lots of chocolate eggs. I'm hoping to make the most of this lovely sun. I'll see you on Wednesday.

Wednesday, 16 April 2014

how to make a hanging herb garden

What a lovely day it was today, so I just had to get out in the garden to start making it look pretty for the summer. This year, I am determined to grow more of my own herbs for cooking, as well as lots of rocket and other leaves for lovely fresh salads. 

I want everything to look lovely without breaking the bank. I have been collecting cans with lots of projects in mind, and I knew I had a tin of paint in the shed. So, this afternoon I made this lovely little herb garden to hang on my shed. It was so quick and easy to make and this is how you can make one, too.

First peel the labels and remove the remains of any glue off the cans using nail varnish remover. Then make a hole for the string, about an inch from the top of each can. You can use a sharp nail and a hammer. Make four more holes in the bottom of each can for drainage.

Then rub all the shiny surfaces with sandpaper or wire wool, to provide a key for the paint. After wiping off any dust, spray the cans with two or three coats of paint, leaving a few minutes between each. I used a tin of multi-surface spray paint I have had in the shed for years. When the paint has dried, for each can, take a 10" piece of the string you are to use and knot it at one end. Thread the string through the hole in the can from the inside out.

At this stage you can fill each can with compost and plant herb seeds, leaving them on a windowsill to germinate or grow. Or you can do what I did and replant pots of herbs from a garden centre or nursery. I used mint, coriander and basil.

When the cans have herbs, tie each of them onto a longer piece of string, spacing them out as you wish. Then hang your herb garden somewhere sunny and give it a good watering.

A quick, easy and cheap shabby chic herb garden. Perfect for all size gardens or even a balcony.


Monday, 14 October 2013

how to create storage with style

This was my perfect solution for the extra storage I needed for my crockery. I fell in love with this shabby chic dresser as soon as I saw it. For those of you who know me, you will already know how much I adore all things shabby chic!

The beauty of it is, the dresser is shallow and doesn't intrude too far into the room. Everything is easy to see and reach when you need it. With the shelving being open, it does give me an excuse to buy colourful, pretty pots. I buy many of my pots from the flea market and Jules china shop in Hebden Bridge. Check her goodies out here.

I like to dress it up at different times of the year; see here how it looked at Easter. It won't be long until I'm dressing it up for Christmas!

Have a lovely Monday.

Saturday, 5 October 2013

small sighs

My newly purchased wedding planner. So cute.

Beautiful gladioli from the flower market.

Luxury chocolate by The Bittersweet Chocolate company from the food fair we went to recently. Chocolate heaven!

Pretty soaps from one of my favourite shops 'Rose & Co.' I love everything about this shop, it is like stepping back in time as soon as you walk in. 

Have a good day.


Friday, 2 August 2013

flea market finds

Here are my thrifted purchases over the past few weeks. In our house we have a love of eclectic things, very similar to the style of the Mad Hatter's mix and mismatch tea party in Alice In Wonderland!! I don't tend to buy sets, it's usually anything I see which I like, often at flea markets (as you can see here!)

I do have a real love for pastels though; I have a Pinterest board just dedicated to pastels. Mint green, pale blue and pink do tend to catch my eye. The jugs will make great vases for flowers which I always have around the house.

Have you got any other ideas what I could use the jugs for?

Have a lovely day,

Monday, 10 June 2013

small sighs

I have a new passion for open sandwiches, this one is topped with peach and brie.

A chocolate and olive oil topping for this sandwich (I know what you are thinking 'chocolate and olive oil together!') but believe me, it is so tasty! Just brush olive oil onto a fresh French bread or toast, then top with grated 70% dark chocolate. Grill for a couple of minutes and enjoy. Two more open topped sandwiches from the book The Little Paris Kitchen.

 These chocolates and doilies definitely win cutest items of the week!

 These pots fall into my love of all things eclectic. I love to mix and match with different colours. 


I've always wanted to try making pasta and now is my chance. S surprised me with these goodies as I have kept talking about giving it a try! Along with the cookery book I should be an expert in no time (eeek). I will let you know how I get on.


Thursday, 2 May 2013

how to create extra storage space

So, you have a lack of storage space, a small kitchen and an alcove that looks sad. What can you do? 

Well, we needed storage and lots of it! The solution was a cupboard that fitted in with the other period details of the house. 

I pride myself in being good at organisation and I spent ages designing this DIY project. I love seeing the process from paper to product and I'm very happy with the result. What do you think?

My first step was to plan and measure the shelf heights we would need for what was to go on them. This was to make sure everything we wanted in there would fit, so we didn't waste any space. 

The next step was to make a frame fastened to the walls and floor. It is easier if you can make this frame fit a standard size of door, but we opted to make them by using MDF. 

The wood for the shelves was reclaimed from an old school, and I got S to cut it leaving a four inch gap between the shelves and the back of the doors. 

The next step was the magic ingredient! I made and attached shelves to the backs of the doors, before we hung them. Again, I measured everything that was likely to go there so I got the most efficient spacing between them.

Then, it was just a matter of drilling holes for the doweling to keep everything in place. A whopping eighteen feet of shelving on the backs of the doors; perfect for herbs, spices, oils and different packages that can litter kitchen cupboards. It's so easy to see everything.

I painted the backs of the inside walls pink (had to get pink in there somewhere!) The shelves inside are finished in a honey gloss to make them wipeable. The frame and the door faces are painted in Farrow and Ball lime white. This is my favourite step; choosing the colours!

The key to creating extra storage space if you are making a cupboard or shelving, is to decide beforehand what you are going to use them for and making the shelf heights to fit.

What have been your storage solutions?


shelves
You may also like " around my home ".

Tuesday, 9 April 2013

around my home


I'm so lucky that I have got a partner that can build practically anything he turns his hand to around my home. It's not what he does for a living but he believes anyone can make things if they put their mind to it. One of the reasons we bought this house was to put our own stamp on it. It's just a modest 1930's house but it still has a lot of its original features.

It has two chimney breasts into which we have put log burners. However, the chimney breasts did present us with a problem. What would we do with the alcoves? We came up with the idea of a DIY bookcase that S promptly designed, then made an MDF box to fit a very awkward space (1930's houses are not the straightest!) S made the shelves different sizes to fit different sized books, vases of flowers and a lamp.

I had quite a few books that I wanted to hand (book hoarder!), and the bookcase is perfect. I love shabby chic and French styles as you can probably see. It houses my fashion and lifestyle books and I do tend to collect pretty notebooks so they stand on there too.

It's amazing how much it actually holds, it definitely adds interest to the room without it feeling cluttered. Everyone who visits my home, including my daughters friends, all make a beeline for the books.


Sunday, 31 March 2013

easter


Happy Easter everyone! Hope you have all enjoyed lots of chocolate eggs and bunnies! This is how I decorated our dining room this year. This basket of flowers, we bought from a nursery, has made a fabulous centrepiece for the table; so colourful and bright. I put duck eggs in a bowl and an egg on each plate with table names on. So cute!


For lunch we decided to have roast chicken with pearl barley, instead of lamb, for a change. I used a recipe from the River Cottage Everyday cookbook. It was delicious and I will definitely make it again as it went down a treat with the family. Empty plates all round!

For dessert we had a chocolate nest cake and chocolate mini egg buns. I did cheat here as I went to Marks and Spencers and saw this heavenly cake and thought to myself that it would so much better (and easier) to buy this.

I decorated the sideboard with chocolate eggs and daffodils, it is really versatile as I can dress it up for any occasion. My girls think I am obsessed with bunting but I love it and it always makes the room look inviting and pretty.

What have you done for Easter this year?


Saturday, 9 February 2013

around my home


A lovely, cosy corner of my dining room. I was very pleased with myself when I came across this side table. The colour is very Farrow & Ball french grey and just what I was after to fill this corner of the room. It could also be used as a bed side table too.

I keep candles in the drawer for my nights by the wood burner and my favourite music discs in the basket. The photo frame was a present from S. I put a card S gave me for my birthday inside it. A friend asked me once if the picture was of my girls which I thought was quite sweet as I think it is really pretty. I keep myself surrounded by flowers as they have a real feelgood factor for me.

What is a feelgood factor for you?


Tuesday, 15 January 2013

small sighs

I'm starting to collect new items for my spare bedroom as I am going to be redecorating it very soon. These are just a few of my new things. The bedroom will be very French inspired as you can see! I adore the cover of the book; such a beautiful picture of Brigette Bardot.

S and I went away for a weekend break to a quaint place called Hebden Bridge. We fell in love with it straightaway; there are so many funky little shops to look round. The beautiful cupcake soaps and glass dish were from a shop called The Yorkshire Soap Co. It is one of the nicest shops I have ever been in. I spent at least an hour trying to decide which soaps to have! Decisions, decisions!

I will post before and after pictures of the room renovation when I start the new project. Stay tuned.


Monday, 7 January 2013

small sighs

Just looking at this picture is making me drool! My friends and family know me soooo well. These are a few pressies I was lucky enough to get for Christmas. I have been looking for a coffee grinder but haven't seen one I like. S managed to find me one in a little antique shop and it's perfect. Below it are the most gorgeous tasting chocolate coated coffee beans!

There's nothing better than a small glass of Bailey's coffee liqueur, so comforting to have at the end of a cold day. I have to say that I had not tasted this flavour before, but it presses all the right buttons for me and it has served me well over Christmas! The chocolate spoons will definitely be used as part of a dessert; watch this space!

Green & Blacks has to be the winner in my top ten of favourite chocolate. I love all the flavours, so rich and creamy. I need to stop talking about it or I will be looking in the cupboard for some and I'm being a good girl today! I love the little pink & white tin of choccie nibbles from S. They were part of my stocking presents; great for a naughty snack! The handmade card was sent to me by my mum. She enjoys making them and sending them to all her family and friends.

What is your naughty chocolate treat?


Friday, 4 January 2013

how to make a room cosy


It has to be in front of the fire with my weekly reading and a glass of wine. When it's cold outside this has to be one of my favourite places to be. I have been doing this as often as possible since we renovated this room. There was a gas fire here before and we took it out and knocked through to restore the original fireplace. The bricks for the arch and hearth are all reclaimed so we could make it look more authentic. The finishing touches, which we were lucky enough to get as bargains from E-bay, were this rocking chair, an old pine table with beech chairs and a sideboard. The paint we used for the floorboards and walls were from Farrow & Ball.

My reading for this week is a mixture of second hand books (gotta love Amazon) that I have been wanting for a while. I am looking forward to reading Tony Curtis' autobiography. I love watching his films especially Some Like It Hot, which is a real favourite of mine. He has to be one of the greatest actors ever!

The other two books on my list this week are Nylon Street (love street style) and Anais Nin's A Spy in the House of Love, which a friend has recommended. Lots to keep me occupied on cold nights in front of my woodburner.

How do you spend your evenings?


Tuesday, 19 June 2012

around my home

This is a corner of my dining room. I don't have a lot of storage space so everything I use has to be pleasing to look at as it is all on display. These shelves were an Ebay find which I just gave a coat of Farrow and Ball Pointing. Most of the things on the shelves were flea market finds. The Cath Kidston plates were a bargain in the sale.
I just collect pretty things to use and don't mind about them matching - I love ecclectic.


Friday, 8 June 2012

birthday morning


When I walked downstairs on my birthday morning.

#The weather outside is frightful......# So much for a garden party today. Ah well. So I came downstairs to a surprise champagne party breakfast for two.

S got the recipes here:
Eggs benedict - here for food and here for egg poaching trick
Strawberry smoothie