Showing posts with label shabby chic. Show all posts

Monday, 20 April 2015

a perfect way to start the day


As a lot of you know, or if you follow me on Instagram, one of my favourite parts of the week are my weekend breakfasts. It feels so good to be able to eat outside in the garden again. I'm sure food tastes better when eating alfresco! Croissants, fruit, smoothies and coffee! What more could a girl want!

My last post was all about choosing the right cafetiere and I'm really pleased to say we have found the perfect one. We chose the Bodum Chambord and we are so glad we did. It pours perfectly, no drips and spills, which makes it perfect for breakfast in bed. I definitely recommend it. I happened to be shopping in TK Maxx and I spotted it at the bargain price of £19 instead of the Amazon price of £44! Although, I still drool over the copper plated version of this one but it's quite a bit more expensive!

A good, hearty breakfast is always needed when a girl is busy looking for wedding dresses! It's exciting times ahead for us as we plan our summer wedding. This dress business is trickier than I thought!

Have a great week lovelies!


Friday, 18 April 2014

how to decoupage a set of ikea drawers

As it's the holidays, I have finally got around to finishing this little set of drawers that I bought from Ikea many years ago. They were looking tired and past their best, so I had to find a way to make them look good enough to stay in my bedroom. I decided to use pictures from old Gil Elvgren desk top calendars.

It is my third decoupage project on the blog as I have also decoupaged a serving tray and a jewellery box.

You will need:
  • wooden drawers, or any other piece you want to decorate
  • pictures on paper
  • water-based primer
  • water-based matte varnish
  • polyurethane varnish
  • PVA glue
  • wooden knobs with screws
  • satin finish paint (for the insides)
  • paper towel
  • fine sandpaper (wet and dry is best)
  • soft cloth
  • paint brush
  • glue brush

What you do:
  1. Wash off any grease from the drawers.
  2. Lightly sand down all surfaces.
  3. Apply two coats of primer, lightly sanding after each coat.
  4. Use the satin finish paint to coat any surfaces you are not decoupaging.
  5. Plan each face by laying out the pictures. Cut each one out and glue it onto the wood, taking care that there are no air bubbles by pressing lightly with a damp lint free cloth. The pictures can, and should overlap to some extent. Let it dry.
  6. Brush on at least four coats (I used six) of water-based matte varnish, sanding lightly after each to remove bumps.
  7. After wiping to remove dust, finish with two coats of polyurethane varnish for extra toughness.
  8. Finish by giving the knobs a coat of primer, a couple of coats of paint and a couple of coats of oil-based varnish. Screw them onto the drawers from the back.

Tip: Give each picture a few moments to stretch after you apply glue. Then, as long as you avoid air bubbles, they will dry flat. Don't be worried by bubbles that seem to keep lifting, as they will flatten when the paper dries.


Have a great Easter weekend. I hope the Easter Bunny brings you lots of chocolate eggs. I'm hoping to make the most of this lovely sun. I'll see you on Wednesday.

Wednesday, 16 April 2014

how to make a hanging herb garden

What a lovely day it was today, so I just had to get out in the garden to start making it look pretty for the summer. This year, I am determined to grow more of my own herbs for cooking, as well as lots of rocket and other leaves for lovely fresh salads. 

I want everything to look lovely without breaking the bank. I have been collecting cans with lots of projects in mind, and I knew I had a tin of paint in the shed. So, this afternoon I made this lovely little herb garden to hang on my shed. It was so quick and easy to make and this is how you can make one, too.

First peel the labels and remove the remains of any glue off the cans using nail varnish remover. Then make a hole for the string, about an inch from the top of each can. You can use a sharp nail and a hammer. Make four more holes in the bottom of each can for drainage.

Then rub all the shiny surfaces with sandpaper or wire wool, to provide a key for the paint. After wiping off any dust, spray the cans with two or three coats of paint, leaving a few minutes between each. I used a tin of multi-surface spray paint I have had in the shed for years. When the paint has dried, for each can, take a 10" piece of the string you are to use and knot it at one end. Thread the string through the hole in the can from the inside out.

At this stage you can fill each can with compost and plant herb seeds, leaving them on a windowsill to germinate or grow. Or you can do what I did and replant pots of herbs from a garden centre or nursery. I used mint, coriander and basil.

When the cans have herbs, tie each of them onto a longer piece of string, spacing them out as you wish. Then hang your herb garden somewhere sunny and give it a good watering.

A quick, easy and cheap shabby chic herb garden. Perfect for all size gardens or even a balcony.


Monday, 14 October 2013

how to create storage with style

This was my perfect solution for the extra storage I needed for my crockery. I fell in love with this shabby chic dresser as soon as I saw it. For those of you who know me, you will already know how much I adore all things shabby chic!

The beauty of it is, the dresser is shallow and doesn't intrude too far into the room. Everything is easy to see and reach when you need it. With the shelving being open, it does give me an excuse to buy colourful, pretty pots. I buy many of my pots from the flea market and Jules china shop in Hebden Bridge. Check her goodies out here.

I like to dress it up at different times of the year; see here how it looked at Easter. It won't be long until I'm dressing it up for Christmas!

Have a lovely Monday.

Monday, 30 September 2013

a romantic italian theme night

I have been wanting to do a theme night for a while now, so I made it part of my September bucket list. As I wanted it to be a romantic evening, I decided it had to have an Italian theme.

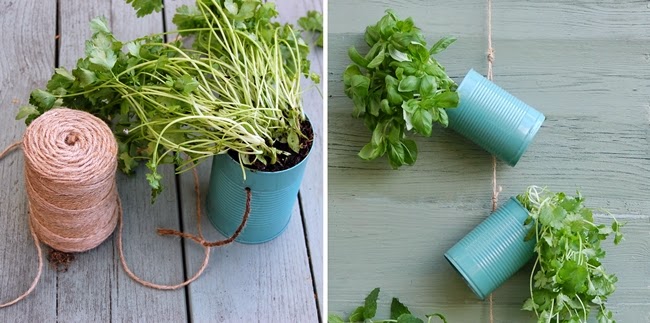
I decorated the table with a red checked cloth to make it look authentic. I added candles and a rosemary plant. You can not have an Italian meal without Prosecco, it is a perfect accompaniment.
With olive bread and olives too, this is a winner.

Starter  - Bruschetta with tomato and basil.


Ingredients (for 2)
4 slces (2cm) ciabatta loaf
250g small plum tomatoes
5 fresh basil leaves torn
1 1/2 tablespoons extra virgin olive oil
salt and pepper
1 garlic clove halved

  1. Toast ciabatta slices on a hot griddle pan for about 3 minutes each side. Leave to cool a little.
  2. Quarter the tomatoes and place in a bowl. Tear in the basil then add the oil, salt and pepper. Mix together, cover and leave for a few minutes.
  3. Lightly rub the garlic on both sides of each slice.
  4. Place 2-3 tablespoons of the mixture on each slice of bread and place on serving board or plate.
  5. Drizzle with the remaining juices, then enjoy.


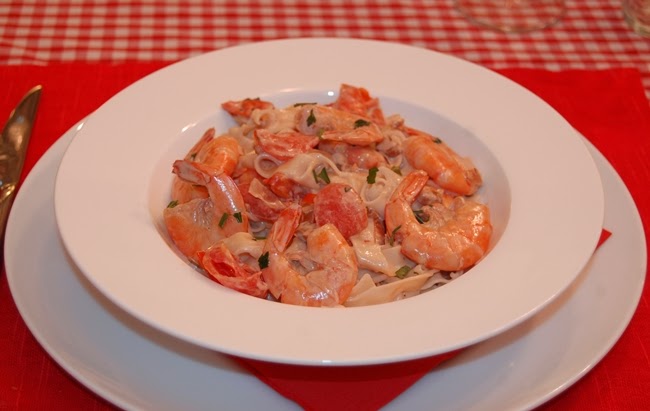
Main - Tagliatelle with prawns and creamy Marsala sauce.


Ingredients
15g salted butter
2 tablespoons olive oil
1 shallot, peeled and finely chopped
30g walnuts chopped
150g uncooked prawns, peeled
5 cherry tomatoes, cut into quarters
30ml Marsala wine
125ml double cream
1/2 tablespoon balsamic vinegar
200g fresh egg tagliatelle (shop bought or recipe here)
1 tablespoon freshly chopped flat leaf parsley
salt and pepper to taste
  1. Melt the butter and oil in a frying pan over a low heat then fry the shallots and walnuts for 2 minutes.
  2. Over a medium heat add the prawns and tomatoes, salt and pepper, and cook for 30 seconds.
  3. Add the Marsala wine and cook for another minute.
  4. Pour in the cream and the balsamic vinegar, and cook for 2 minutes. Set aside.
  5. Cook the pasta in boiling salted water until 'al dente'. Drain and then tip back into the same pan.
  6. Pour in the cream sauce with the parsley. Toss everything together for about 30 seconds and serve. 
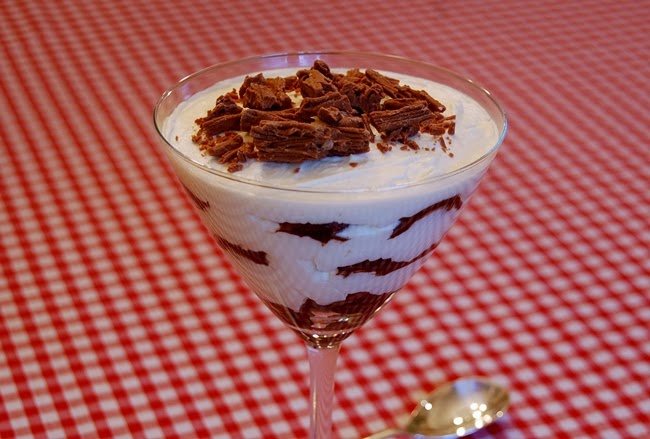
Dessert - Tiramisu

Ingredients
3 tablespoons drinking chocolate
150ml of semi-skimmed milk
150ml whipping cream
125g mascarpone cheese. 
1 1/2 tablespoons caster sugar
1/2 teaspoon vanilla extract
10 lady finger (trifle) biscuits
2 chocolate flakes, or grated chocolate, to decorate.
  1. Put the drinking chocolate and milk in a saucepan over a medium heat, stirring occasionally.
  2. Pour into a bowl and leave to cool when dissolved.
  3. Whip the cream in a bowl until you can make soft peaks.
  4. Add the mascarpone, sugar and vanilla extract and whisk for 10 seconds.
  5. Dip 4 biscuits into the chocolate milk for a couple of seconds on each side and put one on the base of each desert dish. 
  6. Share out half of the mascarpone cream between the dishes, to cover the biscuits.
  7. Add layers of biscuits and cream, depending on the dishes, finishing with a layer of the cream.
  8. Chill for one hour.
  9. Serve with chocolate flakes on each dessert.
Of course, you need some music while you dine. You can have the usual cheesy music, but why not try something a little different like Anna Tatangelo, keeping the Italian theme but making it a little more contemporary.

We finished the night off with Limoncello and a favourite film of mine, 'Under The Tuscan Sun.' It's so perfect and dreamy, just right for an Italian theme night.

Have a great Monday.


Friday, 2 August 2013

flea market finds

Here are my thrifted purchases over the past few weeks. In our house we have a love of eclectic things, very similar to the style of the Mad Hatter's mix and mismatch tea party in Alice In Wonderland!! I don't tend to buy sets, it's usually anything I see which I like, often at flea markets (as you can see here!)

I do have a real love for pastels though; I have a Pinterest board just dedicated to pastels. Mint green, pale blue and pink do tend to catch my eye. The jugs will make great vases for flowers which I always have around the house.

Have you got any other ideas what I could use the jugs for?

Have a lovely day,

Tuesday, 9 April 2013

around my home


I'm so lucky that I have got a partner that can build practically anything he turns his hand to around my home. It's not what he does for a living but he believes anyone can make things if they put their mind to it. One of the reasons we bought this house was to put our own stamp on it. It's just a modest 1930's house but it still has a lot of its original features.

It has two chimney breasts into which we have put log burners. However, the chimney breasts did present us with a problem. What would we do with the alcoves? We came up with the idea of a DIY bookcase that S promptly designed, then made an MDF box to fit a very awkward space (1930's houses are not the straightest!) S made the shelves different sizes to fit different sized books, vases of flowers and a lamp.

I had quite a few books that I wanted to hand (book hoarder!), and the bookcase is perfect. I love shabby chic and French styles as you can probably see. It houses my fashion and lifestyle books and I do tend to collect pretty notebooks so they stand on there too.

It's amazing how much it actually holds, it definitely adds interest to the room without it feeling cluttered. Everyone who visits my home, including my daughters friends, all make a beeline for the books.


Wednesday, 13 February 2013

small sighs


My favourite handbag at the moment! My girl G bought it for me as a gift, I absolutely love the colour. Looking forward to trying it out with my spring outfits.

Loving my style and wellness Moleskine journals; I am determined to collect them all! They are soooo touchy feely and pretty too. The wardrobe organiser inside the style journal is really useful, its where I note which items I have and which season to wear them in.
It goes without saying how fantastic the new book by Scott Schuman is! I was sooo in love with the first one and I was lucky enough to get this one for a gift. I use it for style ideas; piecing together items I already own and putting together outfits. A brilliant coffee table read.
This favourite things box was a gift from S, it is a place where I keep items that are special to me and remind me of good times. I keep old concert tickets in there, postcards and photos from places we have visited, cards that S and I have sent to each other and keepsakes from family.
The brooch was from my lovely Grandma; I can remember her wearing it when I was little. I used to admire how much it sparkled; it has pride of place in my box as you can imagine.
What are some of your favourite things?